


Have you ever found yourself in this frustrating situation? You want to hang a picture, but you need someone to hold it for you. Once it’s finally up, you step back only to see it’s crooked. You take it down to try again, leaving multiple unsightly holes in your wall.
Say goodbye to that awkwardness and waste! Today, we’ll show you how to independently and precisely hang a picture using just a JIMIHOME Tape Measure, turning wall decor into a simple, foolproof process.
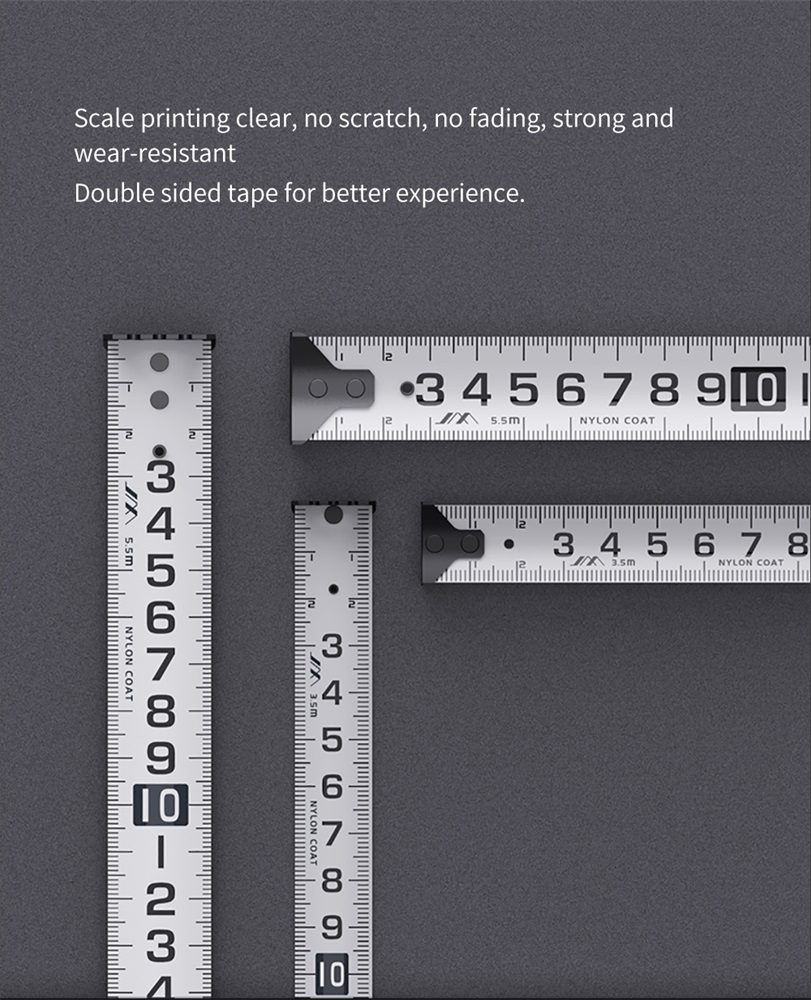
Your "Secret Weapon": A Truly Professional Tape Measure
To achieve perfect results solo, your tape measure needs a few key features:
-
Clear Dual-Sided Scale: Allows for easy and accurate reading from both above and below, eliminating parallax error.
-
Sturdy Hook with End Hook Compensation: Ensures accurate measurements whether hooking over a frame or pressing against a wall.
-
Reliable Locking Mechanism: Keeps the blade securely in place during long measurements, freeing up both your hands.
Step 1: Positioning – Find the "Sweet Spot" on Your Wall
-
Determine the Hanging Height:
Generally, the center of the picture should be 145–155 cm (57–61 inches) from the floor. We'll use 150 cm as our example. -
Measure the Picture Frame:
Use the tape measure to find the vertical height of your frame. Let’s say the frame is 50 cm tall. -
Calculate the Top of the Frame:
-
Picture center = 150 cm
-
Half of frame height = 50 ÷ 2 = 25 cm
-
Top of frame = 150 + 25 = 175 cm
-
-
Adjust for Hanging Wire:
-
Flip the picture over and pull the wire taut.
-
Measure from the highest point of the wire to the top of the frame (let’s say 10 cm).
-
Step 2: Measuring & Marking – Precision for One Person
-
Mark the Top of the Frame:
At 175 cm, lightly draw a short horizontal pencil line. -
Calculate the Nail Point:
-
Nail point = Top of frame – wire-to-top distance = 175 – 10 = 165 cm
-
-
Mark the Nail Point:
Precisely mark a point at 165 cm on the wall.
Pro Tip: Place a small piece of painter’s tape over the mark to protect your wall and make the point easier to see.
Step 3: The Final Check – Ensuring Perfection
-
Simulate Hanging:
Hook the tape measure onto the nail point (165 cm) and extend upwards to 175 cm to visualize the top of the frame. -
Check for Level:
-
For multiple pictures or wide artwork, hold the tape measure casing flush against the wall.
-
The freely hanging blade gives a rough vertical reference.
-
For critical accuracy, a dedicated spirit level is recommended.
-
Step 4: Execute & Admire
-
Hammer your picture hook or nail into the marked spot.
-
Hang your picture, step back, and admire—it will be perfectly straight.
Conclusion: Precision is the Highest Form of Efficiency
A well-designed, high-quality tape measure like the JIMIHOME Tape Measure does more than just measure length. It’s your trusted assistant for independent home aesthetics. Through its precise scale, sturdy hook, and reliable performance, it transforms a complex process into a simple, accurate procedure.
Embrace the confidence of creating a perfect gallery wall all by yourself, and say goodbye to guesswork and messy fixes for good.
Related Products


Leave a Comment